Recently

Showing posts with label LushDIY. Show all posts

23 March 2015

Lush DIY: Mumkin Shower Gel


It was only a matter of time before I found new ways to enjoy my Lush products. Now that I have tried pretty much everything that Lush are currently offering in their shops and I'm on top of my Lush Kitchen orders, I have a little spare time to experiment and convert my favourite Lush products into other formats.

While I may possess one of the largest Lush shower gel collections in England, I obviously don't have enough to satisfy my cravings and I'm always on the lookout for more fragrances to take with me into the shower. After receiving a fresh Mumkin Bubble Bar from the Lush Kitchen last week, I fell in love with the wonder aroma all over again and just knew I had to have this in shower gel format. 

Video:


Review:

What you'll need:

-A bowl 
-A Spoon
-A rolling pin or something strong enough to crush the bubble bar
-An empty plastic bottle (preferably 250g)
-A funnel 

-1 whole Mumkin Bubbleroon 
-200g of unscented Shower Gel

Begin by measuring out the amount of shower gel that you'll need for this project. This time around I used an empty 250g Lush bottle so I roughly filled 4/5ths of the bottle. As per usual, I used the unscented shower gel from Calmer Solutions as I find that this has always worked perfectly in my DIY projects and results in amazing shower gel.   

Place the bubble bar into the bowl and use the rolling pin to crush the product as much as you can. You could probably grate this if you wanted to, but I found this method much easier and quicker - and much more satisfying! Don't worry too much if the bubbleroon is not completely crushed - you can easily wizz it through a blender if you're worried. However, the composition of Lush's bubble bars and bubbleroons means that when they're mixed with the wet ingredients, they react and breakdown so there isn't any lumps to worry about. 

Pour the measured out shower gel into the bowl with the bubble bar and give it a good stir until all of the lumps are visibly gone. While bath bombs will react to the mixture at this point - rising and frothing in the bowl until you're left with what looks like mousse, the bubble bar won't do this. However, it is important that you leave it to sit for a good 30-40 minutes. 

The DIY gel will create rather a lot of bubbles when you're combining the two ingredients. If you try transferring it to a bottle straight away, the mixture will foam up and explode out of the bottle. Believe me - I found out the hard way!

Once you have left the mixture to set and develop, you will need to pour the mixture into the plastic bottle for storage. If you have a funnel, I would highly recommend that you use it as it'll make things far easier. If you don't have one of these handy, you can craft a makeshift funnel using a piece of greaseproof paper and some sellotape  Make sure that if you're using the latter, you support it whilst the liquid is being transferred as it can make a large mess if the paper falls out midway through. 

Once it's in the bottle, it's ready to use. By this stage, the product smells beautiful and the bright shade of red only adds to the allure. Once it has been bottled, you should find you'll have roughly 250g worth of shower gel to enjoy, As there is not preservatives in this shower gel, I would say that this bottle will last roughly 2 months, depending on how it's stored. The shower gel shouldn't separate but you may need to give it a little shake from time to time. 

If you want to conserve your Lush products, you might want to halve both of the ingredients here and make a smaller batch to try out. What is appealing is that Mumkin Shower Gel smells as beautiful, as strong and as refreshing as the original bubble bar - you won't dilute the scent doing this and you certainly won't lose any of the moisturising properties of the bubble bar as it's super soft in the shower and will leave you feeling amazing. Furthermore, you'll also be able to smell remnants of it's beautiful fragrance on your skin when you exit the bathroom. 

While I love the Mumkin Bubble Bar, I love the fact that this bottle will last me so much longer than the two-three baths I would have gotten out of the solid form. As it's a limited edition product, this means I can still enjoy it's light, fruity and very refreshing smell into the summer months. 

This is yet another successful project - lathering up in the shower and giving off a wonderfully strong and beautiful fragrance. The combination of a good quality shower gel and the moisturising properties of all of those wonderful oils in the bubbleroon, leaves your skin feeling really silky soft and clean. I would highly recommend that you give this a try yourself. 


24 February 2015

Lush DIY: Converting FUN Into A Shower Gel


It was only a matter of time before I found new ways to enjoy my Lush products. Now that I have tried pretty much everything that Lush are currently offering in their shops and I'm on top of my Lush Kitchen orders, I have a little spare time to experiment and convert my favourite Lush products into other formats.

After my initial attempt with Lord Of Misrule Shower Gel, I found that my mind was rampant with ideas for what to make next. As shower gels are my Achilles Heel, I felt it was apt that I try my hand at creating another variation - this time using one of my favourite FUN bars, Pink. As it's a regular product, I can top up my shower gel at anytime and this recipe gives versatility to a product that I sometimes struggle using in the shower in it's solid format. 

Video: 


Review: 

What you'll need:

-A Bowl
-A Spoon/A fork
-An empty plastic bottle (preferably 200g)
-A funnel 

-1/2 a FUN bar

-A little under 100g of unscented Shower Gel

Begin by measuring out the amount of shower gel that you'll need for this project. Fill up the 100g empty bottle with the unscented gel and try to leave a small, 1cm gap at the top of the bottle. This will allow room for the excess shower gel that you'll get once you've added in both the gel and the grated FUN bar. 


Pour the measured shower gel into a bowl and leave it to sit while you prepare the FUN bar. Grate half of the FUN bar into the bowl, using the biggest grill on your grater to do so. I say this because using anything smaller will just cause most of the product to get caught in the grates and you'll end up wasting so much of the FUN trying to dislodge the pieces from the grater. 

Manually combine both of the ingredients together with a spoon or a fork. You'll need to stir and beat the mixture for a good 4-5 minutes until all of the lumps have disappeared and you are left with a smooth liquid. Do not attempt to mix these ingredients using a blender - I found that the FUN reacts to the fast movement of the blade and will foam up quite dramatically!

It is important that you leave the mixture to sit for 20 - 30 minutes - allowing it time to settle before transferring it into an empty plastic bottle or tub. If you have a funnel, I would highly recommend that you use it as it'll make things far easier. If you don't have one of these handy, you can craft a makeshift funnel using a piece of greaseproof paper and some sellotape  Make sure that if you're using the latter, you support it whilst the liquid is being transferred as it can make a large mess if the paper falls out midway through. 

Once it's in the bottle, it's ready to use. By this stage, the product will smell really strong and it's colour will be very vivid and beautiful. As there is not preservatives in this shower gel, I would say that a 100g bottle will last up to 10 weeks, depending on how it's stored. 

You may find that the liquid separates a little after a day or so. However, all you need to do is give it a shake and it'll be perfectly fine. While you may be a little disappointed to find that the recipe only makes a little over 120g worth product, and the consistency is a little runny, I can assure you that you need a minuscule amount to create an impressive lather, so this should last you far longer than the average bottle of shower gel. 

18 February 2015

Lush DIY: Shower Jelly to Shower Gel - First Attempt


It was only a matter of time before I found new ways to enjoy my Lush products. Now that I have tried pretty much everything that Lush are currently offering in their shops and I'm on top of my Lush Kitchen orders, I have a little spare time to experiment and convert my favourite Lush products into other formats.

Despite making lots of shower gels using my 'bubble bar to gel' recipe,  I've had many requests to convert Lush's popular shower jelly format into its liquid counterpart. While I won't claim that this is the perfect recipe, I have experimented enough to know that this is the best one I can offer at the moment. This will successfully give you a beautiful smelling, easy to lather shower gel that will work very much like your favourite Lush shower gels. 

Video:


Review:

What you'll need:

-A Blender
-A Spoon
-An empty 250g bottle 
-A funnel 

-100g of Shower Jelly
-150g Unscented Shower Gel

-Water (optional) 

Start by breaking the jelly into pieces and placing it into the blender. You can either cut the jelly into cubes, or do as I did and rip it into pieces. It doesn't really matter how you do it - it's only to help the blender break it down and pulverise it a little quicker. 

Place the jelly into the blender and mix for a good minute. As I stated in my video, it's important that you use a food processor like the one I was using. This type of blender helps to whip and combine the ingredients without tossing them around too much. If you use a smoothie blender, you'll end up with a really foamy mixture and the consistency will be like that of a runny jelly (see the latter two pictures above!). 

Next, add in 150g of unscented shower gel. I still maintain that Calmer Solutions is the best gel I have found to date as it's relatively cheap, fairly thick and really doesn't possess any fragrance at all. Blend the mixture for a further minute or until you think it looks lovely and creamy. 

It's at this stage that you can opt to add a drop of water to the mixture, if you choose. Despite adding only 30ml of water to my gel, I found that it can impact the finished product quite a bit. My Snowman gel above is rather runny and although the scent is really strong, I have to be careful not to use too much with each shower. I also found that adding water will cause the mixture to 'drop' after a day or so. As you can see from the picture above, what started out as 250g of shower gel, quickly turned into about 150g after a day or so. 

On the other hand, my Iced Wine shower gel is much thicker in consistency and as of yet, has not begun to dispel in the bottle. This one still has the same strong fragrance and lathers up beautifully, but it doesn't have any excess water added in.  

Once it's in the bottle, it's ready to use. By this stage, the product smells beautiful and the bright shade adds to the allure. As there is not preservatives in this shower gel, I would say that a 250g bottle will last up to 7 weeks, depending on how it's stored. The shower gel shouldn't separate but you may need to give it a little shake from time to time. 

Iced Wine Shower Gel was a real success - lathering up in the shower and giving off a wonderfully strong and beautiful fragrance. Just as you would normally expect with Lush products, the scent of this stays on your skin long after you've finished showering and it's great for those who love the scents of jellies but don't necessarily get on well with the solid format. 

Snowman Shower Gel was fairly successful, although I wish it was a little thicker in consistency. While I put that down to the addition of water during the conversion process, there is a small part of me that wonders whether it's due to the fact that Snowman Jelly is a self-preserving shower jelly so it has a slightly different recipe than your usual jellies. 

Either way, I'll be making lots of jellies to gels now that I know how easy it is! My next big challenge will be converting shower gel into a jelly format! 

16 February 2015

Lush DIY: Rock Star Soap Sugar Scrub


It was only a matter of time before I found new ways to enjoy my Lush products. Now that I have tried pretty much everything that Lush are currently offering in their shops and I'm on top of my Lush Kitchen orders, I have a little spare time to experiment and convert my favourite Lush products into other formats.

As I've made multiple shower gels, I felt it was time to branch out and try my hand at something else. As somebody who doesn't use that much soap, I seem to have an impressive surplus of the stuff hanging around, collecting dust. So why not transform this abandoned format into something a little more exciting? The All Things Lush UK DIY Sugar Scrub has been born. 

Video:


Review:

What you'll need:

-A Bowl
-A Spoon
-1-2 empty plastic tubs
-A cheese grater
-A blender

-100g of Rock Star Soap
-1 Cup (250g) sugar
-85g Solid Coconut Oil 

Begin by grating the whole block of soap with the biggest grater you can find. The blender will do most of the work at breaking the soap down so you don't have to worry about using the smallest setting on the grater. In fact, this will probably prove to be rather problematic and you may end up with most of the soap stuck in the grates if you do this! 

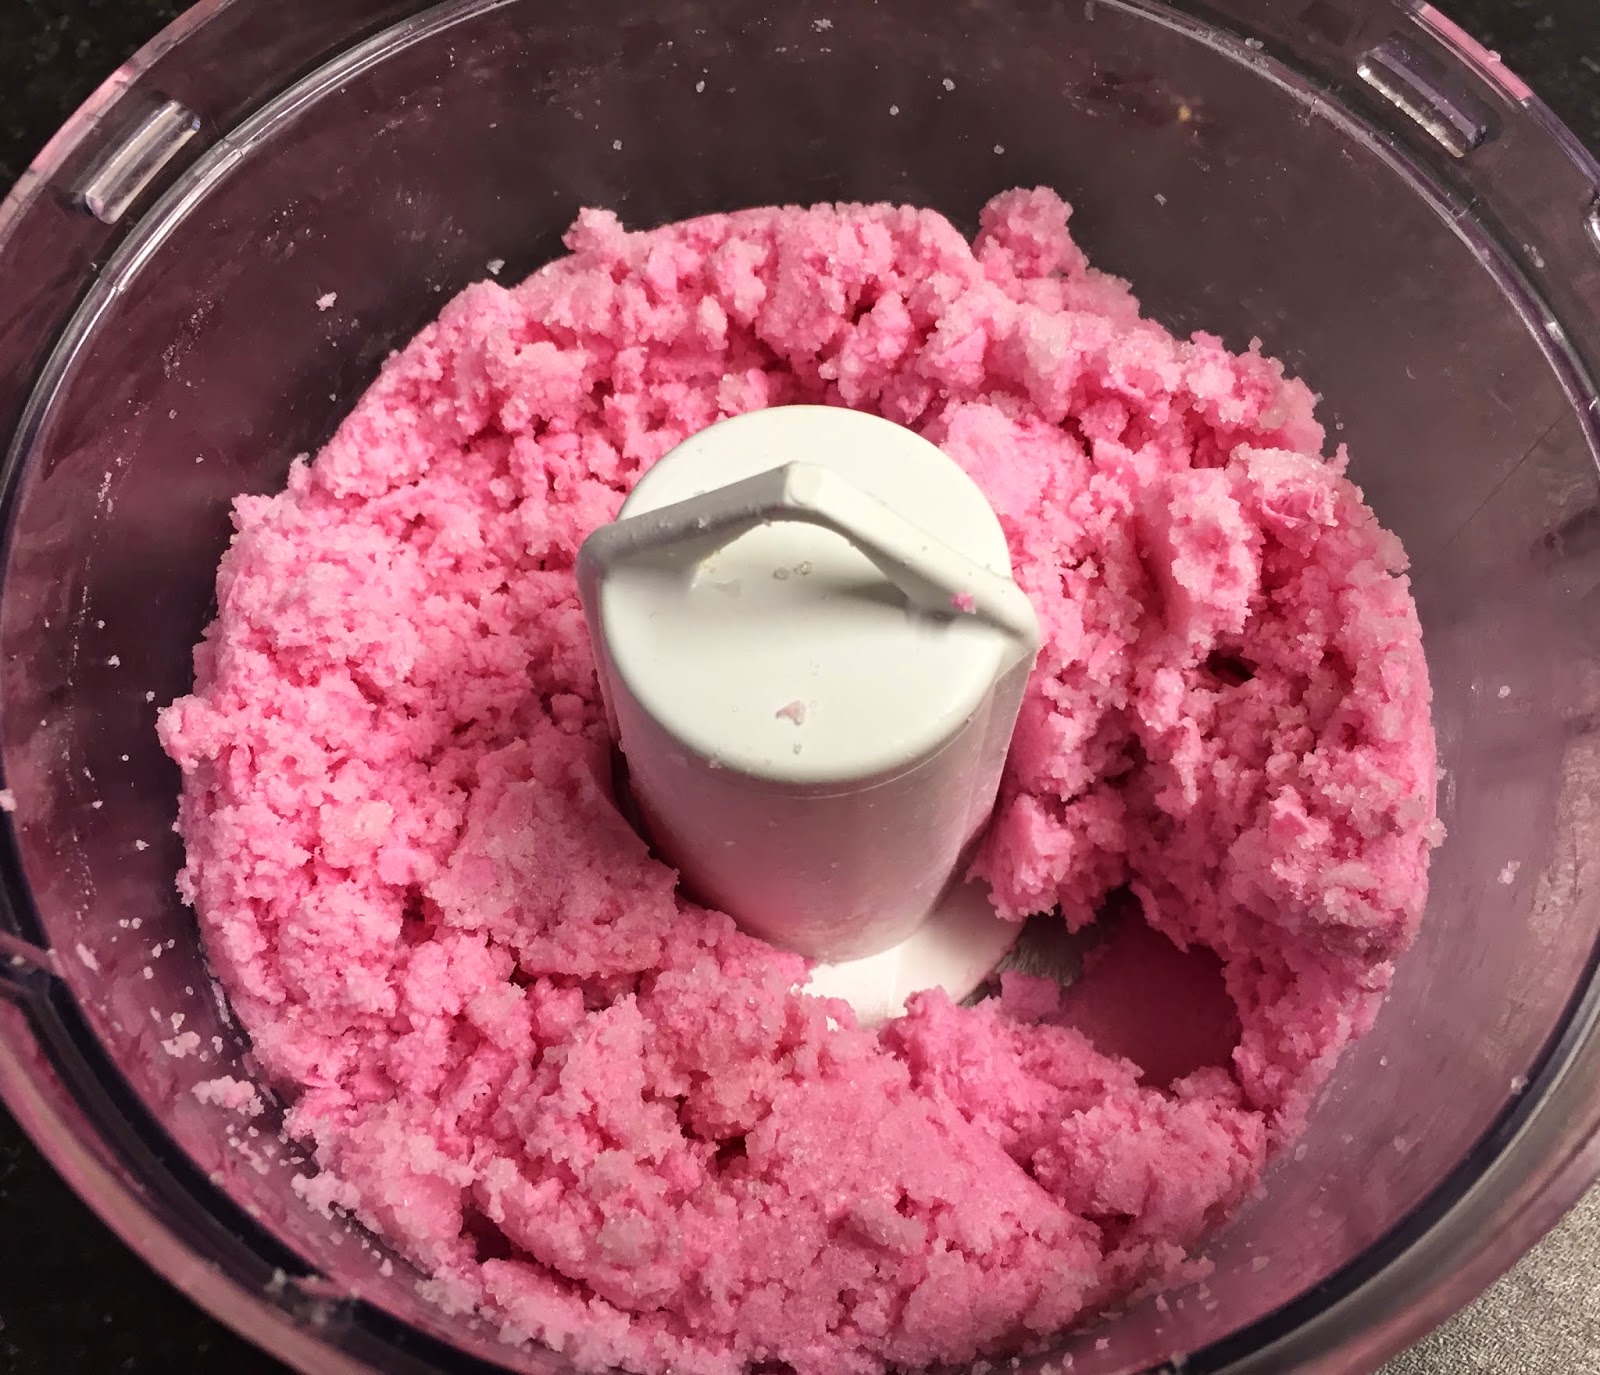
Once this has been done, add the sugar, coconut oil and grated soap into the blender. Depending on what sort of consistency you want, you will need to pick the right sort of sugar to match this. I find that white, granulated sugar works best for those who want an average exfoliator - one that isn't really harsh on the skin but one that will equally scrub away dry skin effectively. 

White sugar also works really well with the sweet and fruity scented soaps, while brown sugar would be more suited for soaps such as Yog Nog, Porridge and any other that has a creamy smell and texture to compliment the caramelised fragrance of the sugar. It's worth experimenting to see which works best for you, and you may even opt to remove sugar altogether and replace it with salt - something I will blog about very soon!

Blend all of the ingredients together, stopping every minute to give the mixture a good stir. You'll need to do this 3-4 times or until you notice that there is no longer any excess sugar up the sides of the blender. I would recommend that you use a blender like the one in my video as it's perfect for combining the ingredients together, whereas a smoothie maker-type blender won't do this as effectively. 

Spoon the mixture into the tubs and it's ready to use! It's that simple!

You may find that the coconut oil comes through quite a bit when you've first transferred it into the tubs, but this subsides slightly and becomes a sweet, wholesome base note that compliments the scent of the Rock Star perfectly. It also works as a great moisturiser in the shower, so while the sugar is exfoliating your skin and the soap is cleaning it, the coconut oil will help to replenish the body with essential oils and leave it feeling super soft. 

In regards to the coconut oil, I would only use this for very sweet scented soaps. Products such as Rock Star, The Godmother and Honey I Washed The Kids are perfect for this as the coconut compliments the candy element of each one. However, most other soaps would probably benefit from using almond oil or something less dominating instead. This is something I plan to test out in the next week or so and I'll reveal the outcome afterwards. 

To use Rock Star Sugar Scrub, take a tiny amount of the product and expose it to the smallest amount of water. Massage it on the area of skin you want to soften and you'll see that it lathers up like a soap but offers a gentle but rough texture to scrub away unwanted dirt and debris. 

My flatmates have been fighting over this all week and they all agree that it's as good as any one of Lush's regular scrubs. One in particular, claimed that it completely rid him of the itchy, dry and rather irritated areas that he had developed on his legs and had been trying to remove for the past couple of months. Result!

I would love to know if any of you plan on making this. Please send me pictures and links to your experiments, and for those planning on trying this out, good luck and enjoy!


11 February 2015

Lush DIY: Yuzu And Cocoa Shower Gel


It was only a matter of time before I found new ways to enjoy my Lush products. Now that I have tried pretty much everything that Lush are currently offering in their shops and I'm on top of my Lush Kitchen orders, I have a little spare time to experiment and convert my favourite Lush products into other formats.

After my initial attempt with Lord Of Misrule Shower Gel, I found that my mind was rampant with ideas for what to make next. As shower gels are my Achilles Heal, I felt it was apt that I try my hand at creating another variation - this time using one of my favourite bubbleroons, Yuzu & Cocoa. As it's a regular product, I can top up my shower gel at anytime and give versatility to a product I could only previously use in the bath. 

Video:


Review:

What you'll need:

-Two bowls 
-A Spoon
-A rolling pin or something strong enough to crush the bubbleroon
-An empty plastic bottle (preferably 100g)
-A Sieve 
-A funnel 

-1/2 a Yuzu & Cocoa Bubbleroon
-A little under 100g of unscented Shower Gel

Begin by measuring out the amount of shower gel that you'll need for this project. Fill up the 100g empty bottle with the unscented gel and try to leave a small, 1cm gap at the top of the bottle. This will allow room for the excess shower gel that you'll get once you've added in both the gel and the crushed bubbleroon. 

Pour the measured shower gel into one of the glass bowls and leave it to sit while you prepare the bubbleroon. Place half of the bubbleroon into one of the bowls and use the rolling pin to crush the product as much as you can. You could probably grate this if you wanted to, but I found this method much easier and quicker. Don't worry too much if the bubbleroon is not completely crushed, the next stage will rid it of any lumps and clumps!

Transfer the crumbled bubbleroon into a sieve and use a spoon to force the product through the grate and into the second bowl. You'll find that once all of the product has been sieved, the crumbs will be very fine and super soft - perfect consistency to make the shower gel.

Pour all of the crumbled  Yuzu & Cocoa into the bowl with the measured-out shower gel and stir until it is fully mixed together. What's wonderful about using such a colourful bubble bar is that the end result is so beautiful - this bubbleroon created a warm, creamy orange gel and reminded me of the inside of a cream egg. Delicious!

While bath bombs will react to the mixture at this point - rising and frothing in the bowl until you're left with what looks like mousse, the bubbleroon won't do this. However, it is important that you leave it to sit for a good 30-40 minutes. The DIY gel will create rather a lot of bubbles when you're combining the two ingredients. If you try transferring it to a bottle straight away, the mixture will foam up and explode out of the bottle. Believe me - I found out the hard way!

Once you have stirred this in, you will need to pour the mixture into the plastic bottle for storage. If you have a funnel, I would highly recommend that you use it as it'll make things far easier. If you don't have one of these handy, you can craft a makeshift funnel using a piece of greaseproof paper and some sellotape  Make sure that if you're using the latter, you support it whilst the liquid is being transferred as it can make a large mess if the paper falls out midway through. 

Once it's in the bottle, it's ready to use. By this stage, the product smells beautiful and the bright shade adds to the allure. As there is not preservatives in this shower gel, I would say that a 100g bottle will last up to 5 weeks, depending on how it's stored. The shower gel shouldn't separate but you may need to give it a little shake from time to time. 

As I have stated before (I should get money for this marketing!), I would recommend that you use the base products from Calmer Solutions if you want to recreate this shower gel. They offer a really good unscented shower gel - the same one that I used in this experiment, and I found that the end result far exceeds all of my previous experiments. 

Yuzu & Cocoa Shower Gel was yet another success - lathering up in the shower and giving off a wonderfully strong and beautiful fragrance. The combination of a good quality shower gel and the moisturising properties of all of those wonderful oils in the bubbleroon, leaves your skin feeling really silky soft and clean. 

The consistency was much better than my previous attempts - the gel was smooth, without any grittiness and it flowed just like a real shower gel, albeit slightly thicker and creamier. I am head over heels in love with this product and will definitely be making this again and again. 

Try it out for yourself with your favourite bubble bar or bubbleroon and let me know how it goes. 


6 February 2015

Lush DIY: Turning Shower Gel Into Body Lotion


It was only a matter of time before I found new ways to enjoy my Lush products. Now that I have tried pretty much everything that Lush are currently offering in their shops and I'm on top of my Lush Kitchen orders, I have a little spare time to experiment and convert my favourite Lush products into other formats.

Aside from pining after shower gel, week in, week out, the only other thought that pops into my head on a regular basis is: 'why won't Lush create a body lotion in that scent?' or 'I wonder what a body lotion in that fragrance would be like!'. It seems that when I'm not smearing myself with lotion in the shower, I'm looking for new ways to lather myself with lotion outside of the shower. 

Video:


Review:

What you'll need:

-A bowl
-A spoon
-An empty tub to store your lotion

-2-3 teaspoons of your favourite shower gel
-100g unscented body lotion

I feel a little patronising doing this edition of Lush DIY because I feel as if I'm not really doing anything particularly special here - just taking a simple idea and making it a reality. It's one of those things that I've often thought about but never committed myself to trying out - until now, that is. 

This recipe should in theory work with any and all of Lush's shower gels, so while I trialled it with my three favourite products, you could quite easily choose your favourite gel and have a go at creating your own body lotion in the same manner. 

Start off by measuring out 100g of unscented body lotion into a bowl. You can opt to make a bigger batch, and if this is something you'd like to do, just double or triple all of the ingredients in the recipe. However, I should state that smaller batches work better as they're far fresher when you use them and 100g will last you quite a while!

As I've had so much success with this product, I again used Calmer Solutions Unscented Body Lotion as I find that not only is this product completely fragrance free as it advertises, but it is also really moisturising on the skin and works as well as some of the more expensive, shop-brought varieties. 

Give your shower gel a shake and then spoon 2-3 teaspoons of it into the bowl with the body lotion - the amount will depend on how strong you want the body lotion to be. Stir it around until all of the gel has been completely dissolved into the moisturiser and then leave it to sit for 10-15 minutes. This will give the body lotion a little time to absorb the shower gel and it's scent. 

You'll notice that the body lotion will develop a light shade of whatever colour the shower gel is. This is something I found really exciting when making this for the first time and I actually prefer it to the boring white/cream colours that you get from Lush. Don't worry though, your skin will not be stained by this colour at all. 

You'll also notice that the consistency of the body lotion is quite light which is due to the oils in the shower gel breaking down the thickeners in the unscented gel. Again, I feel this works to the advantage of the product for many reasons. Firstly, I really dislike lotions that leave your skin feeling greasy and with these ones I didn't find this happened at all. They nourished my skin but were refreshing and very gentle on my body. Secondly, the lotion lasted a lot longer as I needed to use less each time.This means that they are good value for money. 

All three of these body lotions gave off smells that replicated the shower gels perfectly and I was really impressed to find that they all left their mark on my skin, which meant I could enjoy each scent a lot longer than I could before. Both the Ponche and the Twilight creations actually outlasted most of the Lush body lotions I have tried, which was awesome. 

While I cannot comment on how long these lotions will last, I have been using these for over a week now and have found that they still smell wonderfully strong and fragrant - with no sign of separating or discolouration. Given how over zealous I am being with all of these lotions, I'm unsure whether they'll be around long enough for me to see if they have a use by date.  

Having tried all of these out over the past week, I am amazed at the results. As I have been suffering from a rather nasty cold, my hands and feet became incredibly dry and my feet in particular developed areas of dry, flaky skin. After using these lotions twice a day, the dry patches disappeared in a matter of hours and my skin was left feeling really smooth, supple and soft.

For such a simple idea, I am very surprised that it hasn't been tried out by Lushies all across the globe and documented online. However, if there are consumers out there doing this, they don't seem very keen on sharing their endeavours. I really hope this inspires you to try this out with your favourite shower gel and I look forward to hearing and seeing your results! 


3 February 2015

Lush DIY: Violet Nights Body Lotion


It was only a matter of time before I found new ways to enjoy my Lush products. Now that I have tried pretty much everything that Lush are currently offering in their shops and I'm on top of my Lush Kitchen orders, I have a little spare time to experiment and convert my favourite Lush products into other formats.

After my attempt at creating two different shower gels, I thought it was about time that I think outside the box and try something else. As I'm coming close to using up my many pots of body lotion, I thought it would be worth my efforts to attempt making a moisturiser in a scent of my choice. Thus, this wonderful product was created...

Video:


Review:

What you'll need:

-A Bowl
-A Spoon
-An empty plastic tub (preferably 100g)

-100g Unscented Body Lotion

In all fairness, this was the easiest product to make and easily one of the most successful ones to date. It's a project that when I first came up with the idea, I couldn't believe that no one else had suggested this - it made complete sense, and despite it being a dangerous notion, I really couldn't see how it could go wrong. 

First up, pour 100g of unscented body lotion into a bowl. For this experiment, I used Calmer Solution's base lotion and would highly recommend it as it was such a good product to use. Not only is this moisturiser really nourishing on the skin, but it doesn't possess the 'vinegar' element that a lot of unscented base products, despite being marketed as unscented. 

Next, spoon in three level teaspoons of Violet Nights Bath Oil. You can add less if you're looking to conserve this rare item. However, I find that these amounts help to create a perfectly fragrant but not overpowering body lotion - adding more would make it too runny while including less would give it a weaker scent. 

Mix both ingredients together until they have combined perfectly and then pour into your empty plastic pot. As both ingredients have stabilisers and preservatives in them to give them a long shelf life, this body lotion will last for a while, longer if it's stored somewhere cool in-between uses.

Not only is the light mauve colour very pretty to look at, but this body lotion boasts impressive moisturising properties. While I had to make sure it had been probably massaged into my skin, it dried fairly quickly and left my body feeling super smooth and velvety. Furthermore, the scent was really strong on my skin and remained present for a good part of an hour, which is more than most Lush moisturisers can claim. 

For those who love Violet Nights but don't always want to have a bath in order to appreciate the wonderful scent, this body lotion allows you to enjoy the scent and it's nourishing properties all day long. So simple yet equally very beautiful. 


31 January 2015

Lush DIY: Heart Throb Shower Gel


It was only a matter of time before I found new ways to enjoy my Lush products. Now that I have tried pretty much everything that Lush are currently offering in their shops and I'm on top of my Lush Kitchen orders, I have a little spare time to experiment and convert my favourite Lush products into other formats.

After my initial attempt with Lord Of Misrule Shower Gel, I found that my mind was rampant with ideas for what to make next. As shower gels are my Achilles Heal, I felt it was apt that I try my hand at creating another variation - this time using a bubble bar as opposed to a bath bomb. With the Valentine's Day products the most recent addition to the Lush family, I thought it was best that I choose one of those to experiment with. 

Video:


Review:

What you'll need:

-Two bowls 
-A Spoon
-A rolling pin or something strong enough to crush the bubbleroon
-An empty plastic bottle (preferably 100g)
-A Sieve 
-A funnel 

-A Bottle of Unscented Shower Gel
-Golden glitter (Optional)

Begin by measuring out the amount of shower gel that you'll need for this project. Fill up the 100g empty bottle with the unscented gel and try to leave a small, 1cm gap at the top of the bottle. This will allow room for the excess shower gel that you'll get once you've added in both the gel and the crushed bubbleroon. 

Pour the measured shower gel into one of the glass bowls and leave it to sit while you prepare the bubbleroon. Place half of the bubbleroon into one of the bowls and use the rolling pin to crush the product as much as you can. You could probably grate this if you wanted to, but I found this method much easier and quicker. 

Transfer the crumbled bubbleroon into a sieve and use a spoon to force the product through the grate and into the second bowl. You'll find that once all of the product has been sieved, the crumbs will be very fine and super soft - perfect consistency to make the shower gel.

Pour all of the crumbled Heart Throb into the bowl with the measured-out shower gel and stir until it is fully mixed together. What's wonderful about using such a colourful bubble bar is that the end result is so vivid - the shade of red that this shower gel becomes is stunning!

While bath bombs will react to the mixture at this point - rising and frothing in the bowl until you're left with what looks like mousse, the bubbleroon won't do this. However, it is important that you leave it to sit for a good 30-40 minutes. The DIY gel will create rather a lot of bubbles when you're combining the two ingredients. If you try transferring it to a bottle straight away, the mixture will foam up and explode out of the bottle. 

Once you have stirred this in, you will need to pour the mixture into the plastic bottle for storage. If you have a funnel, I would highly recommend that you use it as it'll make things far easier. If, like me, you don't have one of these handy, you can craft a makeshift funnel using a piece of greaseproof paper and some sellotape  Make sure that if you're using the latter, you support it whilst the liquid is being transferred as it can make a large mess if the paper falls out midway through. 

Once it's in the bottle, it's ready to use. By this stage, the product smells beautiful and the bright shade adds to the allure. As there is not preservatives in this shower gel, I would say that a 100g bottle will last up to 5 weeks, depending on how it's stored. The shower gel shouldn't separate but you may need to give it a little shake from time to time. 

If you want to add a little something extra special, the colour lends itself to a generous helping of gold lustre to add a wave of simmer in the bottle. I would recommend that you use the base products from Calmer Solutions if you want to recreate this shower gel. They offer a really good unscented shower gel - the same one that I used in this experiment.

Heart Throb Shower Gel was a real success - lathering up in the shower and giving off a wonderfully strong and beautiful fragrance. I was a little worried to begin with as the smell dissipated somewhat when I first mixed it with the shower gel. However, after it was allowed time to develop, the fragrance acme back even stronger. 

The combination of a good quality shower gel and the moisturising properties of all of those wonderful oils in the bubbleroon, this shower gel leaves your skin feeling really silky soft and you could detect a very faint hint of the smell once I had left the shower. The consistency was much better than my previous attempts - the gel was smooth, without any grittiness and it flowed just like a real shower gel, albeit slightly thicker and creamier. I would just warn you that although it doesn't stain the skin or any surfaces it comes into contact with, I would be wary when you're using this in the bathroom as it will easily splatter the walls and leave you with a big, red mess to deal with.

It was so good that I've already made a large order of these bubble bars to stock up on, so I can remake this again and again across the year. If you love African Paradise, this will be something you need to try. 


UP